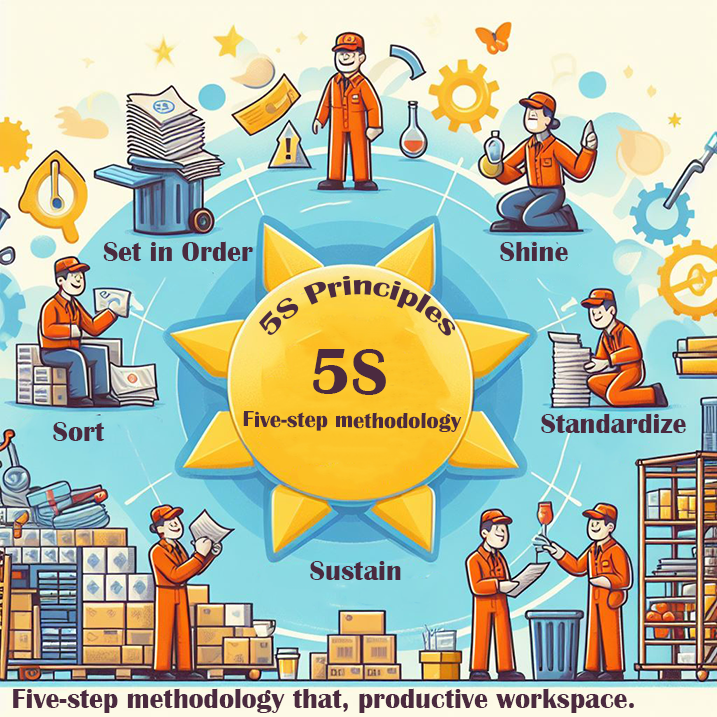
Demystifying the 5S Concept in Industry A Comprehensive Explanation
5S Concept in Industry

Ever wondered what makes some factories run so smoothly  It often comes down to a simple, yet powerful, system called 5S. It’s not some complex tech jargon; it’s really about making your workspace better organized and easier to work in. Think of it as tidying up your desk, but on a much bigger scale and with a specific goal: to boost how well things get done. This approach, which started in Japan, has five key steps that help businesses cut down on wasted time and effort, making everything from assembly lines to office tasks run more efficiently. Let’s break down what is 5S concept in industry and why it matters. Key Takeaways 5S Concept in Industry The 5S concept is a workplace organization method with five steps: Sort, Set in Order, Shine, Standardize, and Sustain. It originated in Japan and is a core part of Lean manufacturing, aiming to improve efficiency and reduce waste. Implementing 5S leads to a more organized, cleaner, and safer work environment. By making tools and materials easily accessible, 5S reduces time spent searching and increases productivity. The system helps establish consistent work practices and fosters a culture of continuous improvement. 1. Seiri Alright, let’s kick things off with the first ‘S’ in our 5S journey: Seiri, or Sort. Think of this as the big decluttering phase for your workspace. The main idea here is to get rid of anything that isn’t absolutely necessary for the job at hand. We’re talking about making space, both physically and mentally, for what truly matters. Why bother with this? Well, having too much stuff lying around is a productivity killer. It makes it harder to find things, increases the risk of accidents, and just generally makes the place feel chaotic. Seiri helps us cut through that noise. Here’s a breakdown of how you might approach the sorting process: Identify everything in your work area. Don’t skip anything, from the biggest machine down to the smallest screw. Categorize items as necessary, unnecessary, or questionable. For those questionable items, maybe set up a ‘red tag’ area where they can be stored temporarily while you decide their fate. Remove the unnecessary items. This could mean throwing them away, recycling them, selling them, or relocating them to a more appropriate storage spot. It might seem simple, but this step is foundational. Without a clear understanding of what you actually need, the other steps in the 5S system become much harder to implement effectively. It’s about creating a clean slate, so to speak. You can find more on the initial steps of the 5S methodology if you want to get a head start. The goal of Seiri isn’t just to tidy up; it’s to fundamentally change how we interact with our work environment by being deliberate about what stays and what goes. This conscious decision-making process is key to long-term efficiency. 2. Seiton Alright, so after you’ve gone through and gotten rid of all the junk with Seiri (Sort), the next logical step is Seiton, or ‘Set in Order’. This is where things start to get really organized. The main idea here is pretty simple: a place for everything, and everything in its place. Think about it – how much time do you waste looking for that one specific tool or that report you know you put down somewhere? Seiton aims to kill that wasted time. It’s not just about shoving things onto shelves, though. It’s about arranging items so they’re easy to find, easy to use, and easy to put back. This often involves using visual cues. We’re talking labels, outlines on tool boards, floor markings, and color-coding. The goal is to make it super obvious where things belong. If someone new walks into the area, they should be able to figure out where stuff goes without asking. Here’s a quick breakdown of how to approach Seiton: Location, Location, Location: Decide where items should be stored based on how often they’re used. Frequently used items go close by, less used items can be further away. Clear Labeling: Every item and every storage spot needs a clear label. No guessing allowed. Visual Aids: Use outlines, shadow boards, or floor tape to show exactly where tools and equipment should be placed. This makes it easy to see if something is missing or out of place. Ergonomics Matter: Arrange things so they are easy to reach and handle, reducing strain and potential injuries. This step is all about making your workspace work for you. It’s about creating a system that supports efficiency and reduces the mental load of constantly searching. Getting this right makes the subsequent steps, like Shine and Standardize, much easier to manage. It’s a core part of creating a more effective lean management practice. 3. Seiso Alright, so after we’ve sorted out what we need and put everything in its proper place, the next logical step is to get things clean. This is where Seiso, or ‘Shine,’ comes in. It’s not just about making the place look nice, though that’s a good bonus. The real point here is to clean thoroughly and, while you’re at it, to spot any problems. Think about it: when a machine is covered in grease and grime, you might not notice a small leak or a worn-out part. But once it’s clean, those issues become obvious. This step is about making your workspace shine, not just for aesthetics, but for functionality and safety. It’s about finding those little problems before they turn into big, expensive ones. This is a core part of the 5S workplace organization method. Here’s what Seiso really involves: Thorough Cleaning: This means going beyond a quick sweep. Get into corners, under equipment, and clean all surfaces. Every tool, machine, and area should be spotless. Inspection During Cleaning: As you clean, actively look for anything out of the ordinary. This could be cracks, loose parts, unusual wear, or any signs of damage. Identifying Root Causes: If you find a problem, don’t just fix it. Try to figure out why it happened. Was it poor design? Lack of maintenance? Incorrect usage? Addressing the cause prevents it from happening again. Making … Read more

Poka-Yoke vs Error-Proofing Differences: Key Growth

Poka-yoke vs error-proofing differences

What is poke yoke In Lean Six Sigma and Six Sigma, Boga-yoke (po-ka yo-ke) is a tool used to identify error-prone steps in a process. Poka-yoke vs error-proofing differences It allows organizations to change to avoid mistakes before operations begin. It is a simple yet powerful tool applicable to any function in any industry. Also known as error-proofing or mistake-proofing, Poke-yoke is considered a key ingredient in the Six Sigma toolbox. Project teams use Poke-yoke in Lean, which focuses on eliminating waste, as well as Six Sigma, which focuses on eliminating defects. In both cases, the ultimate goal is the same: to identify and eliminate potential problems in a process before they occur, or to correct faults in an existing process. When to use error checking If a process is identified where errors or deficiencies in processes are due to human error, particularly the employee’s attention, skill, or experience. In a service operation, a customer may make an error that affects output Poka-yoke vs error-proofing differences During the handover phase in a process, when the output (or, for service processes, the customer) is transferred to another worker When a small error at the beginning of the process causes major problems later in the process When the consequences of an error are costly or dangerous Error checking process Obtain or create a flowchart of the process. Poka-yoke vs error-proofing differencesReview each step and think about where and when human error might occur. For each potential error, work backwards through the process to find its source. For each error, think of possible ways to prevent the error from occurring. Consider: Deletion: Deletion of the step causing the error. Substitution: Replacing the grid with a non-faulty grid. Convenience: It is much easier to take the right action than the wrong one. If you can’t prevent the error from happening, think about ways to detect the error and minimize. Poka-yoke vs error-proofing differences its consequences. Consider the study methods, organizational function and regulatory function explained in detail below. Choose the best fault-blocking method or device for each fault. Test it and then implement it. Three types of survey methods provide quick feedback: A subsequent inspection is done by the next employee at the next stage of the process. Self-checking is when workers check their work immediately after it is done. Proofreading verifies that conditions are correct before steps in the process occur. Often this is automatic and blocks the process until conditions improve. Organizational and regulatory functions System functions are methods of checking a process parameter or product characteristic for errors: The contact or physical method often checks physical properties such as diameter or temperature using a sensor. The speed-step or sequencing method checks the process sequence to ensure that the steps are performed in sequence. A constant value or grouping and counting method counts iterations or parts or weighs an object to ensure completeness. Sometimes a fourth organizational function is added, information development, which ensures that information is available and understandable when and where it is needed. Regulatory functions are signals that alert workers that an error has occurred: Warning functions include bells, sounds, lights and other sensory signals. Poka-yoke vs error-proofing differences Consider using color-coding, shapes, symbols, and specific sounds. Control functions block the process until the error is corrected (if the error has already occurred) or until the conditions are correct (if the probe is a source probe and the error has not yet occurred). Error checking example The Parisian Experience restaurant wants to ensure a high level of service by checking for mistakes. Poka-yoke vs error-proofing differences They reviewed the seating process sequence chart (a detailed flowchart showing who does each step) shown below and identified human errors that could cause restaurant staff or customer service issues. There are two approaches to Poka yoke devices:- Control Approach: This approach identifies a problem and stops the line or process so that corrective action can be taken immediately, thereby Avoiding gradual defect formation. Alert Approach: This approach indicates a trend of variation or divergence by means of increasing buzzers, lights or other warning devices. However, unlike the control method, the warning method does not stop the process in every instance. Poka-yoke devices include three effective methods to ensure fault detection and prevention: Contact method Constant value method Moving step method  Each method can be used in a control approach or a warning approach. The contact method detects any deviations in shape, dimensions, form, position or other physical properties by means of direct contact with the part. Poka-yoke vs error-proofing differences The communication method can be used in fast repeating situations, low production or environmental problems such as poor lighting, critical temperature, dust, noise. Fixed cost method is used in jobs where the same operation is repeated many times. This method uses automatic counters or optical instruments and controls the number of moves, speed and length of move and other important operational parameters. The operation step method is useful for processes that require a single operator to perform several operations sequentially. This method ensures that the operator does not accidentally perform any actions that are not part of normal operation. Benefits of poka yoke The biggest advantage of Boka-Yoga is that it reduces the possibility of human error in a process. Poka-yoke vs error-proofing differences This ensures that all conditions are correct before the next step of the process occurs. The end result is that there will be little or no defects in the process. Apart from this, Poka-Yoke comes with the following other benefits: Improving Quality: Poka-yog improves quality without causing any defects in the process. This means increased stakeholder and customer satisfaction as confidence increases in your process to consistently produce quality products. Cost reduction: The biggest problem with defective products is that they increase the amount of waste. And since they have to be replaced, the cost of production increases as the number of defects increases. Fewer defects mean lower costs. No high-skill requirements: If a process has a … Read more

History and origin of poka-yoke methodology Global Manufacturing

history and origin of poka-yoke methodology

Poka-Yoke Methodology: History and Origins Explained Poka-yoke is a eastern time period meaning “Mistake-proofing” or “errors prevention“. History and origin of poka-yoke methodology It is a way to save you errors in production by means of preventing, correcting, or alerting to mistakes as they show up. Shigeo Shingo added this idea in the 1960s as part of the Toyota manufacturing system. Initially, it become known as “baka-yoke”, or “idiot-proofing”. But Shingo later modified it to “poka-yoke” to make it sound less harsh. The call comes from “poka o yokeru”, a time period from shogi, which means to keep away from a bad flow. A vintage workshop scene showcasing early business gear and equipment, with a focal point on modern devices designed to prevent errors. In the background, a timeline illustrated with key milestones in manufacturing, highlighting the Evolution of first-class manipulate practices. History and origin of poka-yoke methodology  Tender, heat lighting fixtures growing a nostalgic surroundings, with blueprints and sketches of poka-yoke systems scattered round, emphasizing creativity and problem-fixing in design. Key Takeaways Poka-yoke is a eastern term meaning “Mistake-proofing” or “error prevention” The idea changed into formalized and the time period adopted through Shigeo Shingo as a part of the Toyota manufacturing machine within the 1960s Poka-yoke become at the beginning referred to as “baka-yoke”, because of this “idiot-proofing” or “fool-proofing“, but the call was later changed to the milder “poka-yoke” The term poka-yoke is derived from the shogi term “poka o yokeru”, this means that warding off an unthinkably terrible flow Poka-yoke allows gadget operators keep away from errors and defects by means of stopping, correcting, or drawing attention to human errors as they occur Introduction to Poka-Yoke Poka-yoke is a key idea in lean manufacturing. It’s approximately ensuring procedures do not have mistakes. History and origin of poka-yoke methodology  Shigeo Shingo, a big call within the Toyota manufacturing gadget (TPS), started it within the 1960s. What is Poka-Yoke? The phrase “poka-yoke” approach “mistake-proofing” or “mistakes-proofing” in eastern. It is about using tools or systems to help workers keep away from errors. History and origin of poka-yoke methodology The goal is to forestall defects Earlier than they get to the patron. The Meaning and Birth of Poka-Yoke Shigeo Shingo, a top engineer at Toyota, first called it “baka-yoke,” or “idiot-proofing.” however, an operator were given upset, so Shingo changed it to “poka-yoke.” This shows Shingo’s awareness on human beings and regular improvement. Poka-yoke is used in many fields, like medication, where mistakes may be deadly. It allows maintain fine high, stops Horrific merchandise, and cuts down on waste. History and origin of poka-yoke methodology The Poka-Yoke method started in the 1960s. Shigeo Shingo, an engineer at Toyota, created it. He aimed to enhance product nice through stopping defects and mistakes in making things. Shigeo Shingo and the Toyota Production System Shingo noticed a trouble at Toyota. Employees regularly overlooked putting a spring below a transfer button. He fixed this through creating a two-step technique. First, workers positioned springs in a holder. Then, they positioned the springs within the switch. If a spring turned into left within the holder, it showed they forgot. This allow them to restoration the mistake proper away. Shingo first referred to as this “baka-yoke,” or “idiot-proofing.” but, an operator got upset. So, Shingo changed it to “poka-yoke,” that means “errors-proofing” or “mistake-proofing.” The Evolution of Poka-Yoke from “Baka-Yoke” The exchange from “baka-yoke” to “poka-yoke” shows Shingo’s shift. He realized the significance of teamwork and making a tremendous work environment. History and origin of poka-yoke methodology Via the usage of “poka-yoke,” he confirmed errors are ordinary. The intention is to design systems that seize or save you errors, not to shame humans. Now, Poka-Yoke is used in many fields. This includes vehicle making, electronics, and healthcare. It allows make products better, cuts down on waste, and makes paintings extra green. Poka-Yoke Examples and Applications Poka-yoke, or mistake-proofing, is used in lots of areas. It’s discovered inside the clinical field and in our homes. It helps make things safer, improves best, and prevents costly errors. Everyday Poka-Yoke Examples Each day, we use poka-yoke without realizing it. Spell-take a look at on our telephones facilitates us keep away from typos. History and origin of poka-yoke methodology  safety capabilities in home equipment like Microwaves and washing machines additionally prevent injuries by using ensuring they best work whilst the door is closed. Other examples include the three-pin plug design and the overflow stores in sinks. Those features Prevent electrical mishaps and water spills, retaining us safe. Poka-Yoke in Manufacturing and Lean Production Poka-Yoke Application Example Treadmill Safety Clip Treadmills have a safety clip that stops them when pulled, keeping users safe. Elevator Safety Sensors Elevators have sensors that stop the doors from closing if something is in the way, ensuring safety. Lawnmower Safety Mechanism Lawnmowers in the U.S. have a “deadman control” lever that must be pressed to start the blades, making them safer to use. Wheelchair Wheel Lock Wheelchair wheels lock when not in motion, preventing the chair from moving unexpectedly. In Manufacturing and lean production, poka-yoke is prime to reducing defects and improving fine. It makes use of numerous methods to seize and save you mistakes. This ensures merchandise are made Constantly and to a excessive widespread. Types of Poka-Yoke Poka-yoke is a japanese concept which means “mistake-proofing.” It makes use of one of a kind strategies to stop errors and defects in merchandise or processes. History and origin of poka-yoke methodology  Shingo, a well-known business engineer, began the poka-yoke gadget. He recognized 3 foremost approaches to discover and fix defects: The contact method checks product defects by looking at its shape, size, or color. The fixed-value (or constant number) method warns if a certain number of steps are missed, making sure the right order is followed. The motion-step (or sequence) method checks if the steps of the process were done right. Poka-yoke solutions use two kinds of signals to tell the operator about errors: Warning functions, like bells, buzzers, and lights, that catch the problem. Control functions, which stop the process until the mistake is fixed. These poka-yoke … Read more

what is poka-yoke in lean manufacturing Protected Mistake-Proofing

Poka-Yoke Explained: The Art of Mistake-Proofing in Manufacturing In manufacturing, what is poka-yoke in lean manufacturing efficiency and quality define everything. Poka-Yoke is starting to take front stage. This is a Japanese word meaning “mistake-proofing,” sometimes known as “error-proofing. This approach helps to avoid errors throughout manufacturing. Poka-Yoke allows producers to guarantee that their goods are excellent and functional. This enables their adherence to lean manufacturing ideas. The Toyota Production System (TPS) revolves mostly around Poka-Yoke. Many sectors apply it to create more affordable, efficient, and better products. This approach of quality control has altered the way producers handle mistakes. Their main concentration is preventing errors before they start. Key Takeaways In Quality management, Poka-Yoke is a method used to stop manufacturing process flaws or blunders. With an eye toward eradicating flaws at their source, Poka-Yoke’s main objective is defect removal. Simple, useful, and Easy to apply Poka-Yoke solutions help to reduce complexity. Poka-Yoke covers machine and human faults among other kinds of mistakes. Using Poka-Yoke calls for spotting mistakes, creating fixes, and involving staff members at all levels. Introduction to Poka-Yoke Definition and Origin what is poka-yoke in lean manufacturing The Japanese word “mistake-proofing,” or “error-proofing,” is Poka-Yoke. Renowned Japanese engineer Shigeo Shingo devised this concept during the 1960s. Stopping errors before they start is more important than merely correcting them later. Importance in Manufacturing what is poka-yoke in lean manufacturing Making Excellent products and reducing waste in production depend on Poka-Yoke. Using Poka-Yoke strategies allows businesses to immediately stop, correct, or notify staff members of errors. This strengthens and guarantees dependability of the production process. For quality control, Poka-Yoke falls into three primary categories: contact, fixed-value, and motion-step techniques. Depending on what’s needed, these can alert or regulate mistakes. Contact methods spot errors using sensors like pins or beams. Fixed-value techniques guarantee that a process is carried out either with a specified number of components or a given frequency. Motion-step techniques verify whether a step is taken in line with a set time or sequence. Poka-Yoke complement Six Sigma and the Toyota Way Production System really nicely. For manufacturing’s error-proofing and mistake-proofing methods, it’s a great tool. These days, it’s applied in software, healthcare, and other domains as well as in manufacturing. Key Principles of Poka-Yoke what is poka-yoke in lean manufacturing Poka-yoke is a Japanese phrase meaning “mistake-proofing.” Stopping flaws before they start is a major approach to raise quality. It centers on two basic concepts: simplifying designs and eradicating flaws. Defect Elimination Poka-yoke mostly serves to stop mistakes from occurring. It does not wait to correct mistakes afterwards. Finding and resolving fault causes enables poka-yoke to assist businesses strive toward zero flaws. Lean Manufacturing and quality improvement depend much on this. Simplicity in Design what is poka-yoke in lean manufacturing Made to be simple and uncomplicated are Poka-yoke solutions. Key is simplicity of these systems. It prevents fresh errors. This makes poka-yoke gadgets suited for the production process and easy to operate. Adhering to these poka-yoke guidelines enables businesses to apply techniques of error prevention. Better production techniques and constant Quality improvement follow from this. “The essence of poka-yoke is to eliminate the possibility of human error at the source, rather than depending on inspection to catch the faults afterward.” Shigeo Shingo is the Poka-Yoke founder. Types of Errors Addressed by Poka-Yoke what is poka-yoke in lean manufacturing Shigeo Shingo developed the important lean manufacturing method known as Poka-Yoke. It helps to avoid several types of mistakes in creating objects. Human and machine errors are the two main categories into which these mistakes fall. Workers that are not paying attention, are distracted, or lack proper training produce human errors. Simple safety features help Poka-Yoke combat these mistakes. These tools direct employees properly and prevent major errors. Machine errors are those in which equipment breaks down or performs incorrectly, therefore affecting manufacturing of products. With sensors and automated systems, Poka-Yoke addresses these problems. These technologies can locate and correct issues before they become bad products. Poka-Yoke addresses machine as well as human mistakes to improve manufacturing. It reduces waste, increases safety, and raises output. Stopping mistakes before they start, not only correcting them later, is the key to Poka-Yoke’s success. Next, we’ll look at the specific errors Poka-Yoke can fix. We’ll also see the methods and techniques used to put this powerful error-proofing into action in manufacturing. what is poka-yoke in lean manufacturing what is poka-yoke in lean manufacturing In Japanese, Poka-Yoke refers to “mistake-proofing.” Lean manufacturing’s foundation is this. It reduces mistakes right at the beginning, therefore improving quality and helping to Eliminate waste. Engineer and Toyota consultant Dr. Shigeo Shingo came up with Poka-Yoke. The Toyota Production System (TPS) revolves mostly around this. Companies all around the world now employ it to create better products and increase production efficiency. Poka-Yoke avoids errors by means of straightforward, safe, automated, integrated approaches. Three basic forms exist: Contact devices check whether items are in the correct position or touch a certain gadget by means of sensors. Fixed-value approaches require a predetermined number of repetitions or components to complete a project. Motion-step techniques seek for certain actions or steps in a designated sequence or period. Poka-Yoke can be warning systems to let employees know of issues or control techniques to prevent mistakes. These techniques enable one to save time in correcting errors. This results in more progress on all corporate levels. Poka-Yoke has to be economical and simple to use, not slow down employees, halt faulty parts, and provide timely comments if it is to be successful. Done correctly, it streamlines procedures, prevents faulty items from reaching consumers, and makes employees happier by lowering stress and Enhancing their output. Poka-Yoke Principle Description Defect Elimination Poka-Yoke aims to prevent errors and defects from occurring in the first place, rather than relying on detection and correction. Simplicity in Design Poka-Yoke solutions should be simple, easy to use, and integrated seamlessly into the manufacturing process. Continuous Improvement Poka-Yoke is a key … Read more

Image Compressor to 100kb: Fast & Easy Online Tool

image compressor to 100kb

Image Compressor Drag & Drop an image here or Upload Image Original Image Compressed Image Download Compressed Image Compression Level: 50% Compress Image Reset Using the Image Compressor Tool The Compatibility of Compressed Images: On the webpage, locate the “Choose File” button. Click on it to open a file dialog, then proceed to select the image that you would like to compress from your device. Alter Compression Settings (if any): In some cases, these tools will provide compression level settings. If this tool provides options, select the required options that can reduce the quality of the file size to 100 KB or less. If no settings are available for adjustment, then ignore this step. Now Move Onto Compression: After selecting the image, click on the “Compress” button (the button may be labeled differently such as “Start Compression” or “Reduce Size”). The tool will start its work and will turn the image or picture size to 100 KB or close to it. Finally Download The Compressed Image: Once the compression is completed you are likely to see a “Download” button. This process will save the compressed image to your device. Furthermore, file size can also be confirmed by: If you have the intention to verify the new size of the file, you can do so by right clicking the downloaded image file on your device and select “Properties” or “Get info” and see the new size of the file.   Image Compressor to 100KB: Fast & Easy Online Tool In today’s digital world, making websites fast and easy to use is key. Image compressor to 100kb That’s why it’s important to make pictures smaller without losing quality. The Image Compressor to 100KB is a simple free tool that helps with this. It makes it easy to shrink photos for the web. This piece will show you why making pictures smaller is good. It will guide you on how to use this tool. Plus, it will give you tips to make your pictures work best online. Key Takeaways The Image Compressor to 100KB tool offers a fast and easy way to improve pictures for the web. Optimized pictures can greatly improve website speed and user experience. Understand the effect of picture file types and how to choose the best choice for your needs. Learn advanced compression methods to further improve your picture editing efforts. Discover real-world use cases and examples to inspire your own picture editing approach. Why Use an Image Compressor? In today’s fast-paced digital world, reducing graphics smaller is crucial. Using an image compressor delivers substantial advantages for your website’s performance and user experience. Let’s look at how optimized photos may aid. Benefits of Optimized Images Optimizing pictures using a compressor has numerous advantages: Faster Loading Times: Smaller pictures load faster, which is fantastic for keeping visitors engaged and reducing down on bounce rates. Improved User Experience: Quick loading ensures a smoother experience for your visitors, making them pleased with your site. Better Search Engine Rankings: Search engines like Google reward sites with fast-loading material, including graphics. Compressing your photos may increase your site’s search rank and bring in more visitors. Impact on Website Performance Image optimization does more than simply aid users. It also increases your website’s performance: Reduced Server Load: Smaller pictures utilize less bandwidth, which means less pressure on your server and a more reliable site. Faster Content Delivery: Optimized photos reach to your viewers quicker, leading to higher interaction and fewer people abandoning your site. Enhanced Mobile Optimization: For mobile users with sluggish connections, compressed graphics are a necessary. They make the mobile experience considerably better. Using an image compressor might yield major advantages for your site. You’ll notice benefits of picture optimization, website speed optimization, and image compression advantages. These contribute to happy users and improved search rankings for your site. Benefit Description Faster Loading Times Compressed images need less bandwidth, so they load faster. Improved User Experience Quick loading means a smoother visit for your users. Better Search Engine Rankings Search engines like fast-loading sites, which can improve your visibility and bring in more visitors. Reduced Server Load Smaller images use less bandwidth, reducing server load and making your site more stable. Faster Content Delivery Optimized images help deliver your content quickly, keeping users engaged and reducing bounce rates. Enhanced Mobile Optimization For mobile users on slow connections, compressed images are key to a great mobile experience. Introducing the Image Compressor to 100KB Tool In today’s digital environment, cutting photographs smaller for internet usage is crucial. The Image Compressor to 100KB program is a wonderful, easy-to-use choice. It helps users easily compress their photos to 100KB or less. This free image compressor enhances page performance and makes surfing better for everyone. The tool’s core is a clever algorithm. It looks at each picture and utilizes innovative techniques to make it smaller without sacrificing quality. This free image compression tool works with JPEG, PNG, and GIF files. So, you can make all your photographs better. The tool’s UI is simple and basic. Just drag your photographs onto it, and it begins reducing straight away. You receive updates on the file size in real-time. This enables you tweak parameters to meet the 100kb picture compression objective. If you’re a website owner, content developer, or designer, this tool is a must-have. It helps make your photos smaller, which speeds up your website. This implies happy visitors and a greater web presence. See how the Image Compressor to 100KB tool may modify your visual material for the better. Read more >>>>> Time Study Calculator Accuracy & Mastering Work Processes How to Use the Image Compressor to 100KB Step-by-Step Guide Optimizing your photos for the web may dramatically increase your website’s speed. The Image Compressor to 100KB program makes this simple. Here’s a step-by-step explanation on how to utilize this powerful tool. Visit the Image Compressor to 100KB website and click on the “Upload Image” option. Drag and drag your picture file or browse your local computer to … Read more

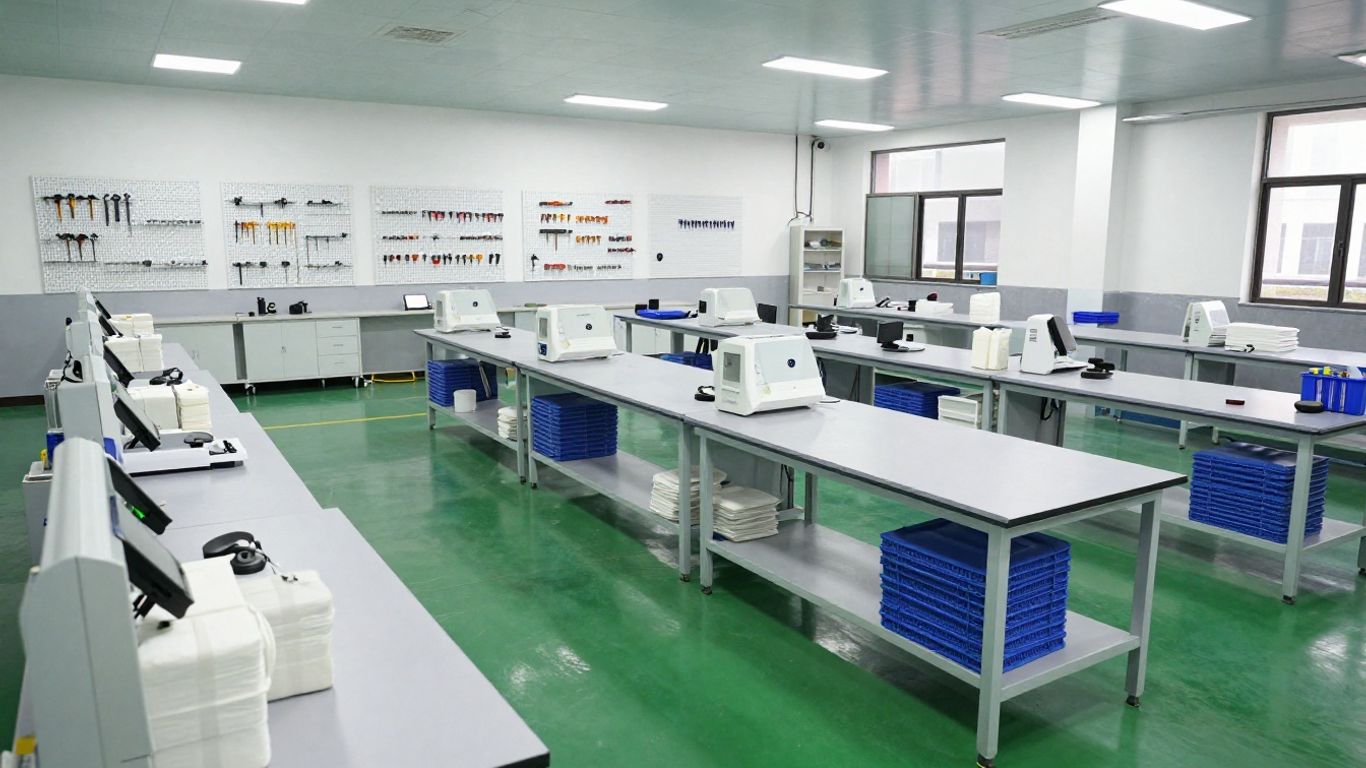
Implementing 5s in the workplace examples Manufacturing for Success

5s in the workplace examples

Introduction Manufacturing processes are known for complex operations that require a high level of organization and efficiency to ensure smooth production and quality output. The 5S methodology has become one of the popular approaches used in the manufacturing industry to organize the workplace and eliminate waste while improving overall efficiency. The methodology is built on five key principles that include Sort, Set in Order, Shine, Standardize, and Sustain. When followed, the 5S principles create a clean, organized, and safe working environment that attains high productivity and quality. The 5S originated from the Toyota Motor Company explicitly the buzz surrounding the Toyota Production System. Toyota’s adoption and success of the 5S methodology These examples of successful 5S implementation inspired other companies, both in and out of the manufacturing industry, to implement these methods. At present, the 5S methodology is applied across industries, including healthcare, retail, hospitality, and education. Specifically, in this blog, we will cover the following: the 5S methodology’s details, especially when it comes to its application in the manufacturing process; the history of the 5S methodology; 5S’s 5 steps; real-life examples; setbacks faced and guides proposed for maintaining these measures and improving them in the long run. Upon completion of this blog, the reader will obtain a complete understanding of the 5S methodology and its benefits when applied in manufacturing. Key Highlights The 5S methodology is a systematic approach to organizing workplaces and efficiency in manufacturing processes The 5S framework consists of five key principles: Sort, Set in Order, Shine, Standardize, and Sustain The 5S originated from Toyota Motor Company and has been widely adopted in various industries Implementing 5S practices can lead to waste reduction, improved productivity, a safer work environment, and standardized procedures 5S can be applied to industries beyond manufacturing, including healthcare, retail, hospitality, and education Understanding the 5S Framework in Manufacturing The 5S framework is a cornerstone of lean manufacturing and the Toyota Production System (TPS). It is a systematic approach to organizing workplaces and improving efficiency in manufacturing processes. The five key principles of the 5S methodology are Sort, Set in Order, Shine, Standardize, and Sustain. These principles aim to eliminate waste, improve flow, and create a safe and organized work environment. 5s in the workplace examples By implementing the 5S framework, companies can achieve continuous improvement and maximize productivity in their manufacturing operations. The Origin and Evolution of  5s in the workplace examples The 5S methodology originated from the Toyota Motor Company in Japan and was a fundamental part of their renowned Toyota Production System (TPS). The TPS, developed by Toyota in the post-war era, revolutionized manufacturing processes by emphasizing efficiency, waste reduction, and continuous improvement. The 5S methodology was further developed and popularized by Shigeo Shingo, a renowned industrial engineer and one of the key architects of TPS. Shingo’s work focused on streamlining processes and eliminating waste through various lean manufacturing techniques, including the 5S methodology. His contributions to lean manufacturing have had a profound impact on the industry, and the 5S methodology has become a widely adopted practice in manufacturing processes worldwide. Today, companies from various industries integrate the 5S methodology into their operations to improve efficiency, reduce waste, and create a more organized and productive work environment. Core Principles of the 5S Methodology The 5S methodology consists of five core principles: Sort, Set in Order, Shine, Standardize, and Sustain. 5s in the workplace examples These principles provide a systematic approach to organizing workplaces and promoting efficiency. Sort (Seiri): The first step in the 5S methodology is to sort through all items in the workplace and eliminate unnecessary items. This process helps declutter the work environment and remove anything that is not essential for daily operations. Sorting enables employees to focus on the essential items and eliminates unnecessary distractions. Set in Order (Seiton): After sorting, the next step is to organize the remaining items in a logical and systematic way. This involves assigning specific locations for each item, ensuring easy accessibility and efficient workflow. Implementing visual cues, such as labels and shadow boards, can further enhance organization and streamline processes. Shine (Seiso): The shine step focuses on cleaning and maintaining a clean work environment. Regular cleaning ensures a safe and hygienic workplace and helps prevent potential hazards and accidents. It also promotes a sense of pride and ownership among employees, leading to increased productivity. Standardize (Seiketsu): Standardization involves establishing consistent procedures and guidelines for organizing, cleaning, and maintaining the workplace. Standardizing processes ensures that everyone follows the same practices, leading to increased efficiency and reduced variability. Sustain (Shitsuke): The final step is to sustain the improvements achieved through the 5S methodology.This requires ongoing commitment from all employees to maintain the organized and clean work environment. Regular audits, training, and continuous improvement efforts are essential to sustain the benefits of the 5S methodology. By implementing the 5S methodology and adhering to these core principles, companies can optimize their manufacturing processes, improve productivity, and create a safer work environment. The First S: Sort – Decluttering the Manufacturing Floor The first step of the 5S methodology is Sort, which involves decluttering the manufacturing floor by eliminating unnecessary items. 5s in the workplace examples This step is crucial in creating a clean and organized work environment that promotes efficiency and reduces waste. During the Sort step, employees are encouraged to evaluate each item in their work area and determine whether it is essential for daily operations. Unnecessary items, such as unused equipment, excess inventory, or outdated documents, are identified and removed. The use of red tags is a common practice during this step. Items that are deemed unnecessary but may have future use are tagged with a red tag and placed in a designated area. After a specified period, if the items are not needed, they are permanently removed from the workspace. Decluttering the manufacturing floor has several benefits. It reduces distractions, improves workflow, and increases overall efficiency. By eliminating unnecessary items, employees can focus on their tasks and work in a more organized … Read more

What are the 10 common types of PPE Comfortable

10 common types of PPE

Introduction for 10 common types of PPE 10 common types of PPE Personal protective equipment, commonly called PPE, consists of specialized clothing and equipment designed to create a barrier against workplace hazards. From hard hats to safety goggles to fall protection gear, proper PPE use is crucial for protecting workers from a wide variety of risks present in all types of job sites, industrial operations, and trades. This guide will outline 10 of the most prevalent PPE types recommended across industries. Following manufacturer specifications and regulations helps ensure the right gear is chosen based on potential dangers. Understanding common PPE can empower employees to prioritize on-the-job safety. Section 1 Head Protection One area all worksites have in common is protecting the head from falling or swinging objects. 10 common types of PPE Hard hats are a universal solution, using a sturdy plastic or fiberglass shell and suspension system to guard against impacts. They come in various sizes and include optional accessories like faceshields or earmuff attachments.   Hard hats – Most ubiquitous type of head protection, used to guard against impact/falling objects Bump caps – Lighter duty option for tasks with lower overhead hazards Mesh caps – Ventilated style good for warmer worksites Face shields – Provide eye and face coverage when using tools/working near risks For tasks with lower overhead hazards, bump caps provide lightweight head coverage. 10 common types of PPE Made from impact-resistant polymers, their lower profile fits under machinery or scaffolding. Another ventilated option includes mesh caps, which allow air flow to prevent overheating – important for tasks in warm indoor or outdoor environments. Faceshields worn with hard hats offer supplementary eye and facial protection against risks like flying debris or chemical splashes. Their clear screen keeps the entire face safe during tasks like woodworking, chipping, grinding, welding, or sandblasting. Section 2 Eye and Face Protection No matter the industry, protecting the eyes should always be a top priority. 10 common types of PPE Standard safety glasses feature flexible frames and impact-resistant lenses, meeting basic ANSI impact standards. They conveniently fit over most workers’ regular prescription eyewear too. Safety glasses – Basic eye protection from impact/debris found in many work environments Safety goggles – Form-fitting option that fully seals around eyes for dust/chemical risks Welding helmets – Shades the entire face and eyes during welding/cutting tasks Face shields – Clear screen that attaches to hard hats for added facial coverage When there are risks of flying particles or chemicals, it’s better to size up to protective goggles. 10 common types of PPE Their form-fitting flexible or foam seal fully surrounds the ocular cavity for extra safeguarding. Options also exist rated specifically for dust, chemicals, or welding light/particulate risks. Welding helmets are essential PPE for any job involving welding, brazing, cutting or torch work. Heavy-duty and fully enclosing, they automatically adjust to different helmet shades to safely view the work area while blocking sparks and radiation. Flip-up style variants allow easier access on/off. Full faceshields provide 360-degree facial coverage as a complement to other PPE like safety glasses. 10 common types of PPE They shield the eyes, face, neck and throat from materials like liquids, dust or debris during production, cleanup or labor tasks. Section 3 Hearing Protection Loud machinery, power tools, or industrial settings put workers at risk of permanent noise-induced hearing damage over time. 10 common types of PPE Basic disposable earplugs made of foam or silicone put a comfortable, affordable filter between environmental sound and ear canal. Reusable options also exist. Earplugs – Disposable or reusable foam plugs that fit snuggly in ear canals Earmuffs – Cushioned pads that protect ears from external noise with an insulating seal Communication headsets – Allow workers to safely hear in loud settings while protecting hearing For very high noise areas, earmuffs or headbands with padded earcup covers offer enhanced protection. 10 common types of PPE They form an acoustically insulating seal around each ear, shielding up to 30 decibels or better depending on class. Communication headsets integrate earmuff cups with microphones and speakers to allow operating equipment safely while still communicating. Section 4 Hand Protection Hands face all manner of hazards from heavy items and materials to chemicals, heat sources, cuts and punctures. 10 common types of PPE Common industrial weight-duty vinyl or nitrile gloves provide a cost-effective barrier for intermittent protection against abrasions during tasks like machinery operation, handling stock, or cleanup. General purpose gloves – Light-duty option often required for basic material handling Cut-resistant gloves – Kevlar or similar materials protect hands from cuts/abrasions Chemical gloves – Rated for compatibility with hazardous liquids, acids, solvents etc. Insulated gloves – Guard hands from electrical/thermal risks, available in various temperatures ratings Cut-resistant gloves, 10 common types of PPE made from materials like Kevlar® or steel mesh, protect against sharp edges, glass, and other hazards. Select the appropriate cut level (A-C with C blocking the most energy) and gauge/weight based on your exact risk. Chemical-resistant gloves choose plastics or laminated rubber best compatible with the specific liquids, vapors, or products handled. For jobs dealing with heat sources like welding, ovens, liquids, electrical tools or other thermal exposures, insulated gloves rated for various temperature levels assure safety to at least 300-1,000°F or more depending on material. 10 common types of PPE Their fiberglass, leather, or synthetic construction keeps hands comfortable even in extreme conditions. Section 5 Fall Protection Working at heights is one workplace danger that can be mitigated through proper fall protection equipment. Safety harnesses secure the torso while allowing full mobility. 10 common types of PPE Their various attachment points accommodate fall arrest, work positioning, and rescue lifelines for tasks requiring climbing, leaning over edges, or working on elevated scaffolds or structures. Harnesses – Full body straps provide fall arrest attachment points for tasks with fall hazards Positioning lanyards – Enable workers to be safely tied off during leaning/reaching tasks Retractable lanyards – Self-retracting lanyards make moving while tied off more convenient Integrated adjustable hardware distributes … Read more

Time Study Calculator Accuracy & Mastering Work Processes

Time Study Calculator

Time Study Calculator Select Time Unit: SecondsMinutes Enter Duration: Enter Hour: Calculate Stopwatch For Calculating your Duration 00:00:00 Start Reset Here’s a step-by-step procedure on how to use the time study calculator 1. Access the Calculator: Open the web page containing the time study calculator in a web browser. 2.Select Time Unit: From the dropdown menu labeled “Select Time Unit,” choose whether you want to measure time in seconds or minutes. This selection will determine the unit for the duration you’ll input. 3. Enter Duration: In the input field labeled “Enter Duration,” type in the time it takes to complete one unit of work. For example, if you selected seconds as the time unit and it takes 10 seconds to complete a task, enter “10” in this field. 4. Enter Hour: In the input field labeled “Enter Hour,” input the number of hours you’re planning to work or the total work time you’re considering for the study. For instance, if you plan to work for 4 hours, enter “4” in this field. 5. Calculate: After entering the duration and hour, click on the “Calculate” button. This will trigger the calculator to process the inputs and compute the production capacity based on the provided values. 6. View Result: Once you click the “Calculate” button, the calculated production capacity will be displayed below the button in bold green text. This result represents the estimated number of units of work you can complete within the specified time frame. 7. Repeat as Needed: If you want to perform additional calculations with different inputs, you can repeat the process by selecting a new time unit, entering a different duration and hour, and clicking the “Calculate” button again. 8. Adjust Inputs: If you find that the initial inputs or results are not satisfactory, you can adjust the duration and hour values accordingly and recalculate until you obtain the desired production capacity. 9. Close the Calculator: Once you have completed your time study calculations, you can close the web page containing the calculator. Time is a valuable resource in any organization, and optimizing its usage is crucial for productivity and efficiency. One tool that aids in this optimization is the Time Study Calculator. But what exactly is a Time Study, and how does a Time Study Calculator contribute to streamlining work processes? 1. Introduction to Time Study Calculator Time Study Calculator is a digital tool designed to facilitate the measurement and analysis of work processes by tracking the time taken for various tasks and activities. It offers a systematic approach to understanding and improving the utilization of time in both individual and organizational tasks. 2. What is a Time Study? Definition A Time Study is a structured method for analyzing how long it takes to perform a specific task or activity. It involves observing, recording, and analyzing the time required for each element of a process to identify opportunities for improvement. Importance Time Studies provide valuable insights into workflow efficiency, resource allocation, and process optimization. By accurately measuring task durations, organizations can identify bottlenecks, eliminate waste, and enhance overall productivity. 3. Why Use a Time Study Calculator? Time Study Calculators offer several advantages over traditional manual methods of time measurement. Efficiency With built-in stopwatch functionality and automated data recording, Time Study Calculators streamline the process of collecting time data, reducing the time and effort required to conduct studies. Accuracy By eliminating human error and providing precise measurements, Time Study Calculators ensure the accuracy of time data, leading to more reliable analysis and decision-making. Cost-effectiveness Investing in a Time Study Calculator can result in long-term cost savings by optimizing resource utilization, minimizing downtime, and improving productivity. 4. Key Features of a Time Study Calculator Time Study Calculators typically include the following features: Stopwatch Functionality Allows users to accurately measure the time taken for each task or activity with the push of a button. Data Recording Automatically records time data and organizes it for easy analysis and reporting. Analysis Tools Provides tools for analyzing time data, identifying trends, and generating reports to inform decision-making. 5. How to Use a Time Study Calculator Setting Up the Study Define the objectives and scope of the study, select appropriate tasks or activities to be measured, and ensure all necessary equipment and materials are available. Conducting the Study Start the stopwatch timer when the task begins and stop it when the task is completed. Repeat for each task or activity being measured. Recording Data Record the time data accurately, noting any relevant observations or factors that may affect task duration. 6. Benefits of Using a Time Study Calculator Enhanced Productivity By identifying inefficiencies and optimizing workflows, Time Study Calculators help maximize productivity and output. Process Improvement Insights gained from time studies enable organizations to streamline processes, eliminate waste, and implement best practices for continuous improvement. Resource Optimization By accurately measuring resource utilization, Time Study Calculators help organizations allocate resources more effectively, reducing costs and improving profitability. 7. Industries That Benefit from Time Study Calculators Time Study Calculators are valuable tools in various industries, including: Manufacturing: Optimizing production processes and assembly lines. Healthcare: Improving patient care delivery and hospital workflows. Retail: Enhancing customer service and inventory management. Service Sector: Streamlining service delivery and resource allocation. 8. Challenges of Time Studies Despite their benefits, Time Studies may encounter several challenges: Implementation Issues Difficulty in implementing Time Studies due to resistance to change or lack of understanding of the process. Data Accuracy Ensuring the accuracy and reliability of time data collected, especially in dynamic or complex work environments. Time Constraints Limited time available for conducting comprehensive Time Studies, particularly in fast-paced or high-demand settings. 9. Overcoming Challenges Training and Education Providing adequate training and education to stakeholders involved in Time Studies to ensure proper understanding and execution of the process. Software Integration Integrating Time Study Calculators with existing software systems and workflows to enhance compatibility and ease of use. Continuous Improvement Fostering a culture of continuous improvement to address challenges, adapt to changing conditions, and optimize … Read more